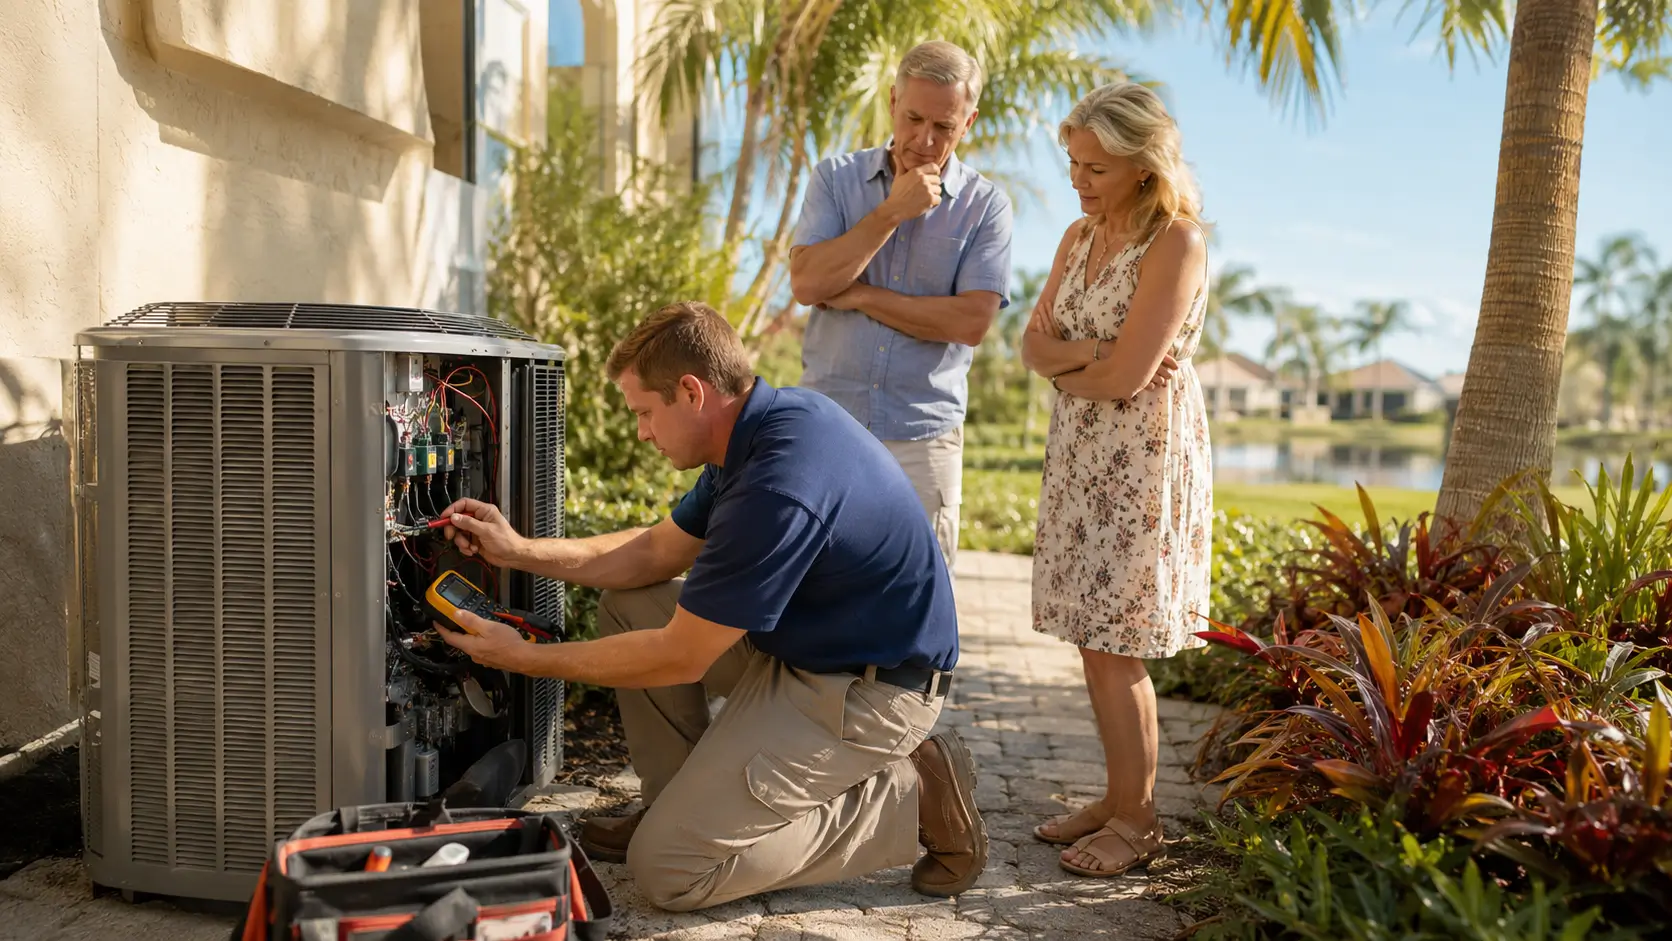
There is nothing more frustrating than realizing your AC is blowing warm air on the hottest day of the year. In most cases, the culprit is an AC compressor not kicking on, and that single failure brings your entire cooling system to a standstill.
The compressor is the engine of your air conditioning unit. It pressurizes refrigerant and circulates it through the system to pull heat out of your home. When it refuses to start, no amount of thermostat adjustments will bring the cool air back. The good news? A compressor that won’t activate is often caused by a fixable component failure rather than a dead compressor.
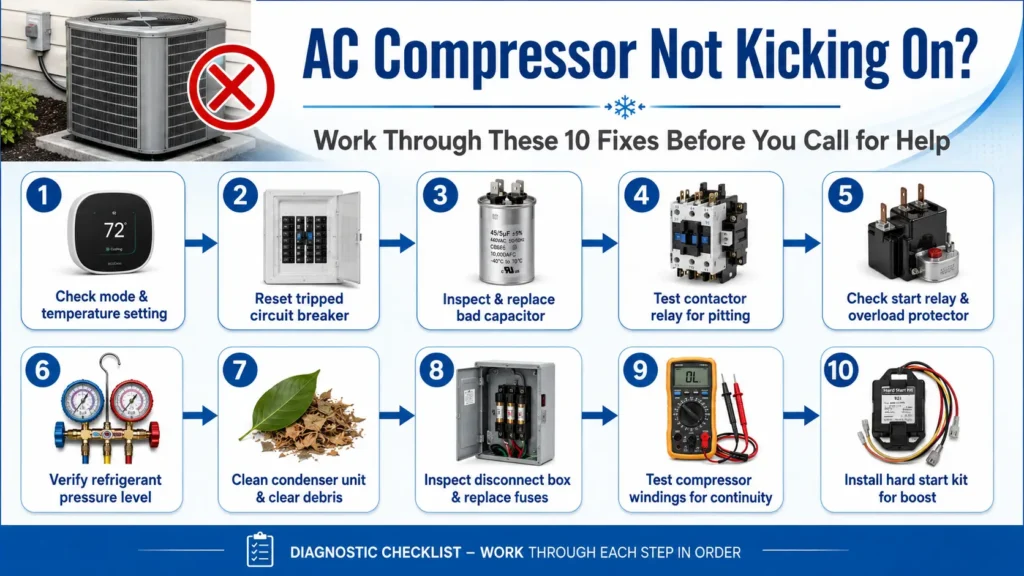
This guide walks you through the 10 most effective fixes, explains what causes this problem, what it costs to repair, and when it makes more sense to replace your unit entirely.
Table of Contents
What Actually Do? The AC Compressor Not Kicking On
Before diagnosing the problem, it helps to understand the compressor’s role. Think of it as the heart of your air conditioning system. The compressor takes low-pressure refrigerant gas from the evaporator coil inside your home and compresses it into high-pressure, high-temperature gas. That gas then travels to the condenser coil outdoors, releases its heat, and returns as a cool liquid to absorb more heat from inside your home.
If the compressor does not activate, this refrigeration cycle cannot begin and you are left with a fan that blows air but no actual cooling. Every fix in this guide targets the reason the compressor fails to receive the signal or power it needs to start.
Signs Your AC Compressor Not Kicking On
Not sure if your compressor is the problem? These symptoms point directly to a compressor activation failure:
- Warm air from vents, even after the system has been running for several minutes.
- The outdoor unit is running, but the compressor motor itself is silent.
- A clicking or humming sound, near the outdoor unit, with no follow-through startup.
- The indoor fan works normally, but the temperature never drops.
- The circuit breaker for the AC trips, repeatedly when you try to run the system.
- The outdoor unit does not turn on at all, despite the thermostat calling for cooling.
If you are experiencing one or more of these, your next step is to work through the fixes below in order, starting with the simplest.
10 Fixes for an AC Compressor Not Kicking On
Fix 1: Verify Your Thermostat Settings
It sounds basic, but an incorrect thermostat setting is one of the most common reasons for an AC compressor not kicking on. Check the following:
- The mode must be set to Cool, not Fan Only or Heat.
- The set temperature must be at least 3–5 degrees below the current room temperature.
- If you have a programmable thermostat, confirm the schedule is active and the batteries are not low.
- For smart thermostats, check that the app shows the correct mode and that it is communicating with the system.
A thermostat set to Fan Only will circulate air but never signal the compressor to start. This one check takes 30 seconds and could save you a service call.
Fix 2: Reset the Circuit Breaker
Your outdoor AC unit has a dedicated circuit in your electrical panel. A power surge, overload, or short can trip this breaker, cutting off power to the compressor entirely.
Steps to check:
- Locate your electrical panel and find the breaker labeled for the air conditioner or HVAC
- If it is in the middle position or fully switched off, flip it completely to Off, then back to On
- Wait 30 minutes before restarting the system to let the compressor’s pressure equalize
- If the breaker trips again immediately, do not keep resetting it; there is an underlying electrical issue that requires a licensed electrician
A tripped breaker is a symptom, not the root cause. If it keeps happening, the problem could be a failing compressor drawing too much current, a short in the wiring, or a grounded compressor winding.
Fix 3: Replace a Weak or Blown Capacitor
The capacitor is a small cylindrical component inside the outdoor unit that delivers a high-voltage jolt to start the compressor motor and keep it running. It is one of the most common causes of an AC compressor not kicking on and also one of the most affordable repairs.
Signs of a bad capacitor:
- The outdoor unit hums but never fully starts
- The top of the capacitor is bulging or has oil residue around it
- The compressor starts occasionally, then shuts off
Capacitors hold a dangerous electrical charge even when the system is off. Discharge them properly before handling, or have a technician replace them. Capacitor replacement typically costs $75 to $200 and can restore a non-starting compressor within minutes.
Fix 4: Inspect the Contactor Relay Switch
The contactor is an electrical switch in the outdoor unit that closes the circuit when the thermostat calls for cooling. Over time, the contact points become pitted, burned, or coated with carbon, preventing a clean electrical connection.
How to identify a bad contactor:
- Visually inspect the contacts inside the outdoor unit; they should look smooth and metallic, not black and pitted.
- You may hear the contactor click when the thermostat calls for cooling, but the compressor still does not start.
- A technician can test it with a multimeter for resistance.
Contactor replacement is a common, low-cost repair. If the contacts are severely burned, the entire contactor must be replaced rather than cleaned.
Fix 5: Test the Start Relay and Overload Protector
On window units, mini-splits, and some older central systems, the compressor relies on a start relay to provide extra torque during startup and a thermal overload protector that shuts it down if it overheats.
If either of these components fails, the AC compressor not kicking on even though the rest of the system appears functional.
Testing approach:
- A multimeter can check the start relay for continuity. If it reads open, it has failed.
- The overload protector can be tested similarly; if it has tripped due to heat, the system may restart after it cools down (give it 30 minutes before testing).
- On window units, the start relay is often the first thing to check before assuming the compressor itself is bad.
Fix 6: Check for Low Refrigerant and Pressure Faults
Modern AC systems are equipped with low-pressure and high-pressure safety switches. If refrigerant leaks from the system and the pressure drops below a safe threshold, these switches cut power to the compressor to prevent damage.
Signs of a refrigerant issue:
- Ice is forming on the refrigerant lines near the indoor unit.
- A hissing or bubbling sound near the outdoor unit.
- The system runs but provides no meaningful cooling before the compressor shuts off.
- Significantly higher electricity bills without a change in usage.
Refrigerant is regulated under EPA Section 608, and handling it requires a certified technician. A tech will locate and repair the leak, then recharge the system to the manufacturer’s specified pressure level. Do not attempt to add refrigerant without addressing the leak it will escape again and damage the environment and your compressor.
Fix 7: Clean the Outdoor Condenser Unit
A condenser unit surrounded by debris leaves, grass clippings, dirt, or even landscaping mulch pressed against the fins cannot release heat efficiently. When the system overheats, the thermal safety switch shuts down the compressor automatically to prevent permanent damage.
DIY cleaning steps:
- Turn off the power to the outdoor unit at the disconnect box before doing anything.
- Remove any debris from around the unit and trim back vegetation to at least 18–24 inches on all sides.
- Use a garden hose (not a pressure washer) to gently rinse the fins from the inside out.
- Let the unit dry for 20–30 minutes before restoring power.
This is a step many homeowners overlook, yet it is one of the most effective ways to prevent compressor shutdowns during peak summer heat.
Fix 8: Check the Disconnect Box and Wiring
Between your electrical panel and the outdoor unit, there is typically a disconnect box mounted on the wall outside. This box contains fuses or a pull-out disconnect block. If the fuses have blown or the disconnect has been pulled and not reseated, the compressor will receive no power regardless of what the thermostat is doing.
What to look for:
- Visually inspect the disconnect box for blown fuses (a broken wire inside the glass fuse).
- Ensure the disconnect block is fully inserted.
- Look for signs of burning, melting, or discoloration on the wires inside the box.
Blown fuses should be replaced with fuses of the exact same amperage rating — never a higher rating, as this removes overload protection from the circuit.
Fix 9: Use a Multimeter to Test the Compressor Windings
If all external components test fine and the compressor still will not start, the compressor motor itself may have failed internally. A multimeter can help confirm this.
Testing compressor windings:
- Locate the three terminals on the compressor (labeled C for Common, R for Run, and S for Start).
- Test resistance between each pair; you should get a low resistance reading on all three combinations.
- A reading of zero (short circuit) or infinite resistance (open winding) indicates internal compressor failure.
- Also, test between each terminal and the compressor body. A reading here indicates a grounded compressor.
A compressor with failed windings cannot be repaired in the field; it must be replaced. At this point, the cost-versus-replacement analysis (covered below) becomes very important.
Fix 10: Hard Start Kit Installation
A hard start kit is an add-on capacitor and relay that provides the compressor with a significantly stronger startup jolt. It is particularly useful for older compressors that struggle to start, systems running on long refrigerant line sets, or compressors that fail to start during high-demand periods.
Benefits of a hard start kit:
- Reduces startup stress on the compressor motor.
- Can extend compressor life by years in borderline cases.
- Often resolves intermittent startup failures without full replacement.
- Costs between $100 and $250 installed.
This is a professional installation, but a worthwhile investment if your compressor is struggling to start rather than is completely dead.
Repair Costs: What to Expect
Understanding the cost landscape helps you make an informed decision when your technician presents options.
| Repair | Estimated Cost |
|---|---|
| Thermostat replacement | $100 – $300 |
| Capacitor replacement | $75 – $200 |
| Contactor relay replacement | $100 – $250 |
| Start the relay or overload protector | $50 – $150 |
| Refrigerant recharge (with leak repair) | $250 – $750 |
| Disconnect fuses | $20 – $60 |
| Hard start kit (parts + labor) | $100 – $250 |
| Compressor replacement | $1,200 – $2,800 |
| Full system replacement | $3,500 – $7,500+ |
Most component-level repairs fall well under $500. The math changes significantly if the compressor itself has failed, particularly on systems that are out of warranty.
Repair vs. Replace: How to Decide
When the compressor itself fails, you face a significant financial decision. These guidelines help you evaluate which path makes more sense.
Consider replacement when:
- Your system is 10–15 years old or older.
- The repair cost exceeds 50% of the cost of a new system.
- The compressor is out of the manufacturer’s warranty.
- You have had multiple component failures in the past few years.
- Your current system uses R-22 refrigerant (phased out and no longer manufactured).
- Your energy bills have been climbing despite normal usage.
Consider repairing when:
- Your system is under 8–10 years old and in good overall condition.
- The compressor is still under a parts warranty.
- The failure was caused by an external factor (power surge, capacitor failure) rather than internal wear.
- You can pair the repair with a maintenance plan to monitor future performance.
A reputable HVAC technician will help you weigh these factors honestly. Be cautious of anyone who immediately recommends full replacement without first diagnosing which component has failed.
How to Prevent This Problem in the Future
Preventing an AC compressor not kicking on comes down to one thing: consistent maintenance. Here is what that looks like in practice.
Schedule professional maintenance twice a year
A spring tune-up before cooling season and a fall check before heating season allows a technician to identify worn capacitors, low refrigerant, and dirty coils before they cause a failure on a 95-degree afternoon.
Change your air filter every 30 to 60 days
A clogged filter restricts airflow across the evaporator coil, causing the system to run longer and harder, eventually triggering overload protection and shutting down the compressor.
Keep the outdoor unit clear year-round
Do not stack anything against the unit, and keep shrubs and hedges trimmed back. After storms, check that no branches, leaves, or yard debris have lodged in the fins.
Install a surge protector
Power surges from lightning strikes or grid fluctuations can destroy capacitors and damage compressor windings in a fraction of a second. A whole-home surge protector or HVAC-specific surge protection device is a low-cost insurance policy.
Monitor your system’s performance
If you notice your home is taking significantly longer to cool than it used to, your energy bills are rising, or you hear new sounds near the outdoor unit, schedule a diagnostic call. Small problems caught early are almost always cheaper than full component failures.
When to Call a Professional HVAC Technician
Some of the fixes in this guide, such as checking thermostat settings, cleaning around the outdoor unit, and resetting the breaker, are safe for homeowners to handle. But several situations require a licensed professional:
- Any work involving refrigerant (EPA certification is required).
- Replacing capacitors (they hold dangerous charge levels even when unplugged).
- Diagnosing or replacing the compressor itself.
- Electrical wiring repairs inside the outdoor unit.
- Any situation where the breaker trips more than once.
Attempting refrigerant work or high-voltage component replacement without proper training puts you at serious risk of injury and can permanently damage your equipment. The cost of a service call is far lower than the cost of an avoidable accident.
Cost Snapshot
Approximate AC repair costs by common service type.
Conclusion
An AC compressor not kicking on is a stressful problem, especially when temperatures are at their peak. But in most cases, the compressor itself is not the culprit; a failed capacitor, tripped breaker, bad contactor, or refrigerant issue is far more likely.
Work through the fixes in order, starting with the simplest. You may find that a quick thermostat adjustment or a reset is all it takes. If the problem goes deeper, understanding the components involved helps you have a more informed conversation with your HVAC technician and helps you recognize whether the recommended repair is the right one.
If your system is older or has had repeated failures, use this opportunity to evaluate whether a new, energy-efficient system might serve you better in the long run. The right decision now can mean years of reliable cooling without the worry of another summer breakdown.
FAQs
Q1: What is the most common cause of an AC compressor not kicking on?
A failed capacitor is the single most common cause. It prevents the compressor from receiving the electrical boost it needs to start and is one of the most affordable repairs in HVAC.
Q2: Can I fix a compressor that won’t start without calling a technician?
Some fixes, like checking thermostat settings, resetting the breaker, or cleaning the outdoor unit, are safe for homeowners. Anything involving capacitors, refrigerant, or internal electrical components should be handled by a licensed technician.
Q3: How do I know if the problem is the capacitor or the compressor itself?
If the outdoor unit hums but does not start, the capacitor is the most likely cause. If the unit is completely silent with no power-related explanation, or if it trips the breaker when it tries to start, the compressor motor may have failed. A technician with a multimeter can confirm within minutes.
Q4: How long does an AC compressor typically last?
Most compressors last 10 to 15 years with proper maintenance. Systems that have been neglected, run with dirty filters, or operated with low refrigerant often see premature failure.
Q5: Is it worth repairing the compressor if my AC is 12 years old?
This depends on the overall condition of the system and the cost of repair. If the compressor itself needs replacement and the system is 12 or more years old, a new unit is often the smarter investment, especially if efficiency improvements will reduce your energy bills.
Q6: Why does my AC compressor keep shutting off right after it starts?
This is typically caused by a failing start relay, a weak capacitor, or an overload protector triggering due to overheating or high amperage draw. A hard start kit can help, but a technician should confirm the root cause first.
Still not running? Call a licensed HVAC technician for a professional diagnosis.
- All In One AC, (954) 701-6450, South Florida!
Leave a Reply